|
Contents |
Index | Close
Help |
|
Citation Map |
|
A Citation Map is a
graphical representation that shows the citation relationships (cited
references and citing articles) between a paper and other papers using
various visualization tools and techniques. Using citation mapping,
you can analyze which researchers are citing your papers. You can also choose
to organize and color code the results by author, year, journal title,
subject category, and more. You can also set up a
graphical representation of the papers that you have cited in a published
work. You can also choose to organize and color code the results by author,
year, journal title, subject category, and more. From the Full Record page,
click the Citation Map link to go to the Citation Map start page where
you can create your Citation Map. Forward Only: View records that cite the selected
target (focus) record whose name appears in the title bar at the top
of the page. Backward Only: View records that the target record
cites. Forward and Backward: View both forward and backward
records. First Generation - Records that directly cite or are
directly cited by the target record are first generation. The default
generation is set at 1. Second Generation - Records citing records that cite
the target record and records cited by records cited by the targeted record
are second generation. 3. Click the Create Button
to Create Your Citation Map After you create your
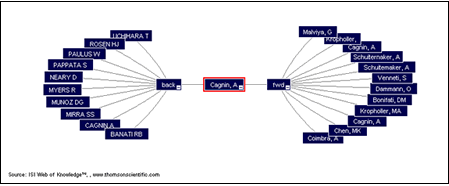
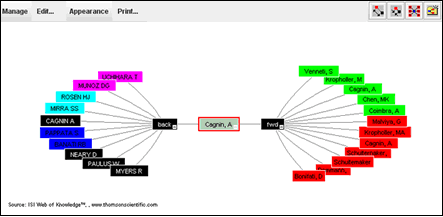
Citation Map, the target record is shown in the middle of the Citation Map
panel. To the right of the target
record are papers that cite the original paper (citing articles). This is the
forward view. To the left of the target
record are papers that are cited by the target record (cited references).
This is the backward view.
Citation Map with Forward and
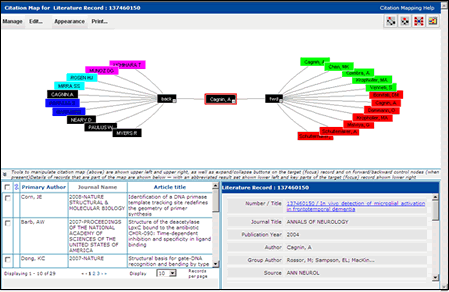
Backward Views The Citation Map is
generated and displayed in a three-panel window. ·
The
top panel (Citation Map) is an interactive graphical presentation of the
Citation Map consisting of a citation tree of nodes (records) showing
their citation relationships. ·
The
lower left panel (Results Set) displays a summary of cited and citing records
in the Citation Map along with the Primary Author, Journal Name, and Article
Title. ·
The
lower right panel (Record View) displays the Full
Record of the target record.
View of Citation Map, Results Set, and Record View Panels You can move the nodes
around (including the target node) by clicking and dragging them using your
mouse. This feature allows you to see parts of the map that are on the edge
of the panel. This dragging action also brings the centered-map section into
a fish-eye-lens-like view so you can see the individual nodes more clearly. By hovering
your cursor on any node, you can view bibliographic information about that
paper. A white expand / collapse
button displays in the bottom-right corner of the target node if there
are citations for that record. Click to expand or collapse the display. You
can find these buttons on the back and fwd nodes. Results Set and Record
View Panels The lower portion of the
Citation Map window contains a Results Set panel (lower left) and a Record
View panel (lower right). A close An open The Results Set panel
shows how the data in the panel looks for records in Web of Science. The panel contains all of
the records covered by the Citation Map you are viewing. The arrow icon
indicates whether the record is a forward or backward citation. The default
sort for the list is target record first and the remainder
sorted by publication number in ascending order. You can re-sort the list. Use the check box to
select a node to highlight it in red. You can also select a record and choose
Set Node Color from the Appearance menu to change the color of one or
more of the nodes in your map. The check box in the column header allows you
to select all records on the page. Use the standard page
navigation arrows to move from page to page in the Results Set. Use the standard Display
menu to choose to display 10, 20, 50, 100 records per page. The Record View panel
displays field data for records in Web of Science. The Number / Title
of a record is linked to the Full Record in Web
of Science. By selecting and
double-clicking any node in the citation tree, you can view Full Record
details in the Record View panel. Note the following: ·
If
no Author is available but a Group Author is available, then we provide the
Group Author label. ·
If
no Group Author is available but an Author is available, then we provide the
Author label. ·
We
only display a field label if data is present. The Manage menu allows you
to create a new Citation Map, save a Citation Map as an editable image, and
refresh the data in all three panels. Create New Citation Map
Save Citation Map As
Image
Refresh
The Edit option allows you
to change the direction of your Citation Map
and the number of generations that appear.
When you select Edit, the Citation Map start page appears for the current
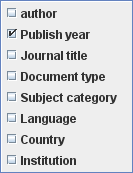
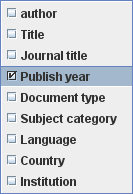
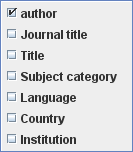
target record. The Appearance menu allows
you to order, color-code, and label citation tree nodes according to various
record fields. Order Nodes By
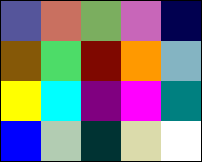
Color Code By
1. Follow steps 1 - 3 in the section
called Creating a Citation Map. 2. Select Publish Year from the
Order Nodes By menu. The nodes shift positions and
are now in chronological order. 3. Select Publish Year from the
Color Code By menu. Records published in the same
year all have the same color. 4. Select Author from the Set
Node Text menu. 5. Click the close
Citation Map Organized and Color Coded by Publish Year
Set Node Text
The Print button
opens a pop-up browser window that displays the Citation Map image. Click the
Print link in the top right corner to print the image. These buttons help you
quickly reconfigure your Citation Map.
|
Information About ...
System Requirements To create and view
Citation Maps, you must install the most current version of the Java runtime
environment and the necessary browser plug-in. To install the most
recent current version of Java and the associated plug-in, click Free Java
Download More About Generations A paper's cited
references and citing articles are referred to as the first generation
of cited and citing papers. Each of those cited papers may have cited
references of their own and each of the citing articles may have citing
articles of its own. This second level of papers is referred to as the second
generation. |
This help page last modified 5/29/2008
© 2008 THOMSON REUTERS
