This chapter addresses the following topics.
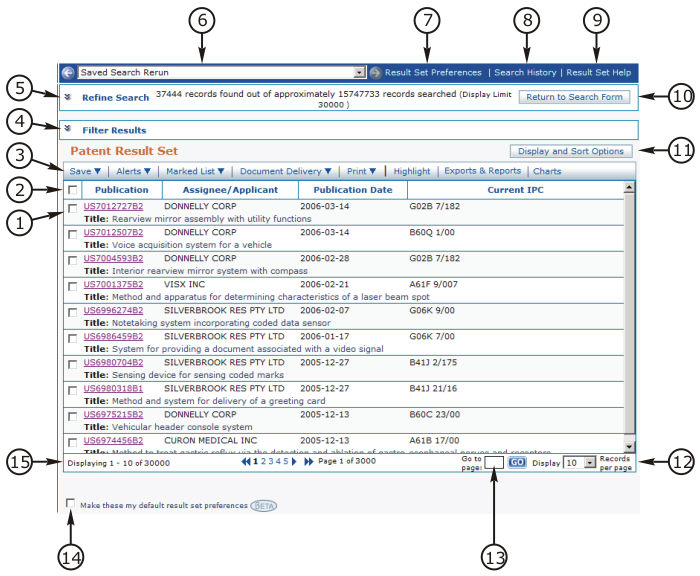
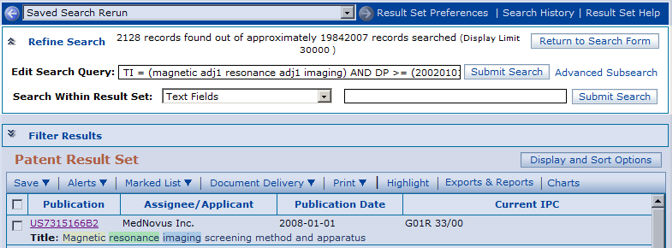
The Patent Result Set is shown below.
Patent Result Set Features
(1) The Record Row
(2) The Column Headings
(3) The Patent Result Set Tool Bar
(4) The Filter Results panel
(5) The Refine Search panel
(6) The Breadcrumb Navigation tool
(7) The Patent Result Set Preferences link
(8) The Search History link
(9) The Patent Result Set Help link
(10) The
Return to Search Form button 
(11) The
Display and Sort Options button 
(12) The
Records per Page selector 
(13) The
Go to Page box 
(14) The Make These My Default Search Preferences checkbox
(15) The
Page Count display 
The Column Headings and a typical Record Row are shown below.
The Column Headings
The column headings are the names of the fields selected for display in the result set. The default selection is shown above. You may change these in the Display & Sort Options panel, or in Patent Result Set Preferences.
Many of the field names in column headings are links that enable you to sort the result set by that field, in either ascending or descending order.
Click any sortable field name to sort on that field. Click it a second time to reverse the sort order.
The default patent result set sort order is by publication number, descending order. Click the word Publication to sort by publication number, ascending order. Click it again to return to descending order.
The following fields are sortable column headings.
|
Priority Number |
|
Priority Country |
|
Priority Date |
|
Related applications |
|
Current IPC-R |
|
ECLA |
|
ECLA-Main |
|
US Class Main |
Default Record Sort Order
The default record sort order is first by collection as detailed below, and second by date, most recent to earliest.
US Granted & Applications
European Granted & Applications
WIPO Applications
Japan Applications (JAPIO)
German Granted, Applications, and Utility
Great Britain Applications
France Applications
Korea Granted & Applications
Japan Granted & Applications (Machine Assisted Translations)
Korea Granted & Application (Machine Assisted Translations)
Japan Granted
INPADOC
The Record Row
The Record row contains all the fields you have selected for display, as well as the title and abstract fields. The field data is displayed in columnar fashion beneath each column heading.
Click the publication number link to open the patent document in Record View.
The Patent Result Set tool bar is shown below.


To save the query you used to generate the current result set, click Save Search Query.
Select records by checking their checkbox. Select all records on the current page by checking the master checkbox in the list sort row. Select all records on the result set by leaving all checkboxes unchecked.
To save the selected records as a new Work File, click New Work File. If you have not selected any records, all are saved as a new Work File.
To add the selected records to an existing work file, click Add to Work File. If you have not selected any records, all are added.
Note that a work file may contain a maximum of 1000 records.
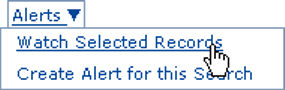
To receive notification that a patent record you are watching has had a change to its family, legal status, publication stage or citations, click Watch Selected Records to display the Watched Records panel, shown below.

Please see the Watched Records chapter for a complete description.
To receive notification that a search you created has been run for you and that the results are available for you to review, click Create Alert for this Search to display the Create Alert Setup panel, shown below.

Please see the Alerts chapter for details.

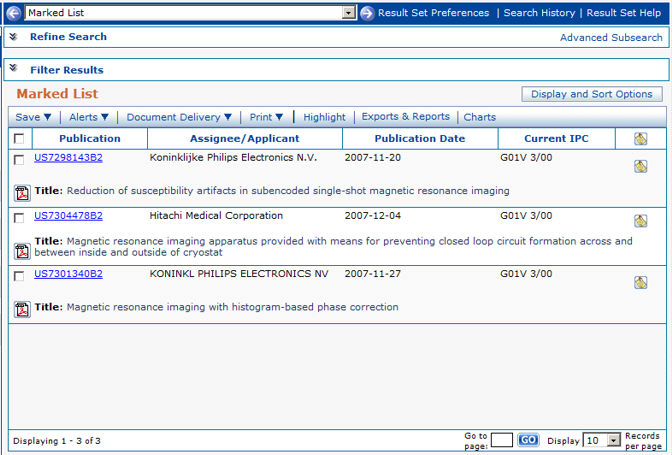
Use the Marked List to compile a temporary list of records from a number of different result sets or work files, then add them to a work file or save them as a new one. Alternatively, add records to the marked list so that they may be examined more closely later, before saving them to a work file. Unlike a work file, which may contain only records of like type, the marked list may contain records of any type.
Add selected records to the marked list by clicking Add to Marked List.
After you have added the selected records to the marked list, their checkboxes on the result set are surrounded in yellow. This is to confirm that these records are now on the marked list. See below.

Even though you have not saved the marked list, it appears in your Work Files folder during your session. To view the marked list, click Marked List then View Marked List on the patent result set toolbar, or click the Marked List link in the Saved Work File Metadata panel. See the Saved Work chapter for details.
The marked list is shown below. It contains both patent and literature records. Note the two tabs titled Patents (3) and Literature (3). These indicate that the marked list contains three patent records and three literature records.
You are presented with the following dialog when you log in.

If you wish to retain the Marked List from your
previous session, click the Retain button, then click OK  .
.
If you wish to clear the Marked List, click OK .
If you wish to save these settings for future sessions,
check 
You may also clear the Marked List by clicking Marked List, then Clear All Marks on the Patent Result Set toolbar.
Note that if you wish to save the contents of the Marked List as a Work File, you will need to save each record type as a different Work File. A Work File can only save records of like type.

To order copies of selected patent records, click Order Patent Documents. The order confirmation screen displays. The order confirmation screen is shown below.
If you wish to return to the order confirmation
screen later to complete your order, or if you wish to include file histories
in your order, be sure to click the Save and Close button  on the order confirmation screen. If you leave
the order confirmation screen without saving your order, your order will
be cleared.
on the order confirmation screen. If you leave
the order confirmation screen without saving your order, your order will
be cleared.
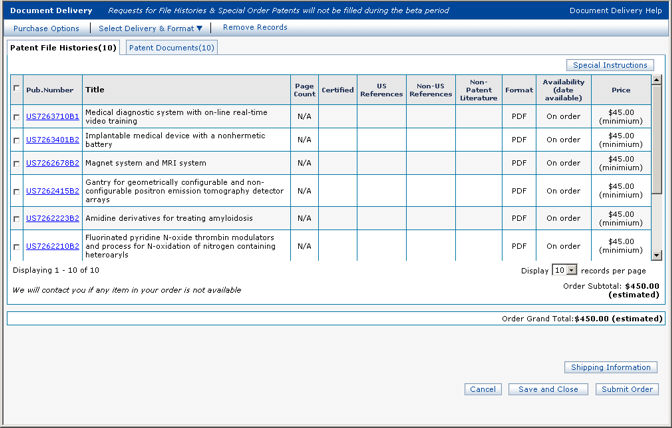
To order file histories for selected patent records, click Order File Histories. The order confirmation screen displays.
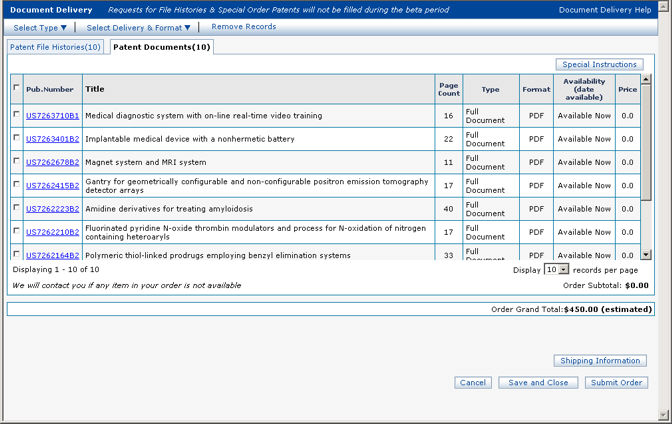
Click Order File Histories to display the Document Delivery Patent File History panel, shown below.
To view your saved order, click View Order. The order confirmation screen, above, displays.
Please see the Document Delivery chapter for a complete explanation of all Document Delivery features.

The Print feature produces a printer-friendly copy of your result set.
Click List to print the entire result set.
To print only specific records, first select records by checking their checkbox, or select all records on the current page by checking the master checkbox in the list sort row. Then click Selected Records to produce a printer-friendly copy containing only the selected records.
An example of the printer-friendly copy is shown below.

Click Print  to send the printer-friendly
copy to your printer.
to send the printer-friendly
copy to your printer.
Note that in order to print highlighting, highlighting for printing must be enabled. See the Preferences chapter for more information.
Note that "Print background colors and images" must be enabled in your browser preferences in order for highlighting to print. See your browser documentation for details.

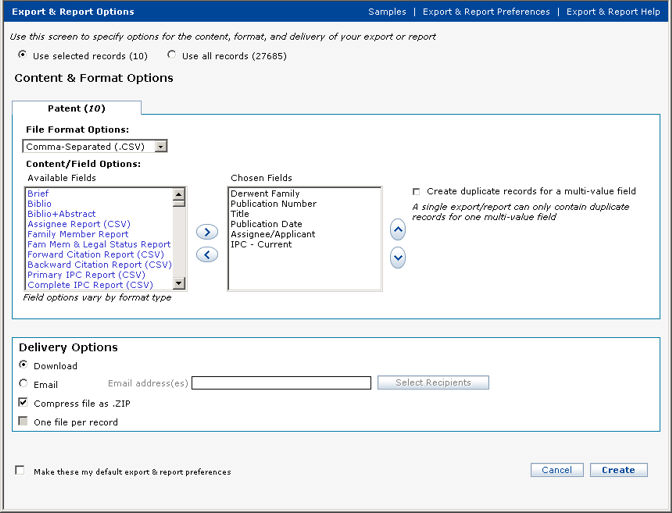
You may export selected records in a number of different formats as a report. You may select the fields you wish to include in your report, and specify the order in which they appear. You may specify delivery options as well. Set these parameters in the Export & Report Setup panel.
To display the Export & Report Setup panel, shown below, click Exports & Reports.
Please see the Exports & Reports chapter for details.

Click Highlight to display the Highlighting panel, shown below.
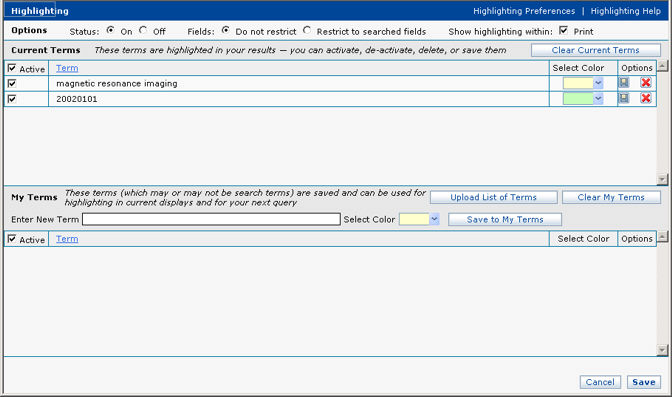
Use the Highlighting panel to add or remove highlighted terms or to change highlighting colors.
Note that "Print background colors and images" must be enabled in your browser preferences in order for highlighting to print. See your browser documentation for details.
Please see the Highlighting chapter for details.
To turn highlight printing on or off, see Highlighting Preferences.

To create a chart based on selected records, click Charts. The Charts panel, shown below, displays.
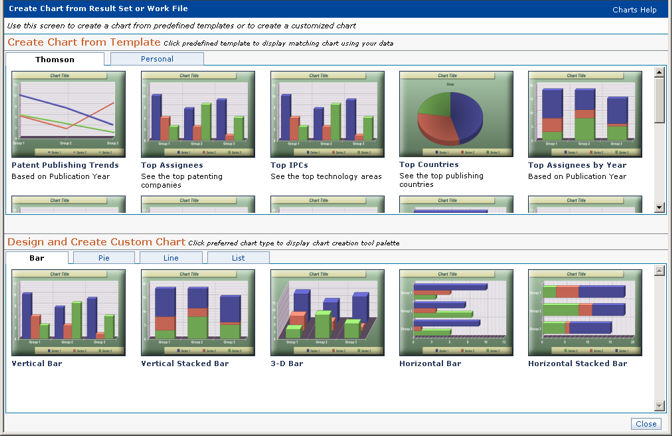
Please see the Charts chapter for a complete description.
Click the Display and Sort Options button to display the Display and Sort Options panel, shown
below.

Use the Display and Sort Options panel to configure your Patent Result Set display to best suit the way you work. Simplify your screen by displaying only the fields and tools you need.
Options include
Select which fields and icons to display
Select the sort field
Select the number of records to display per page
Select the default drawing size
Select the Collapse behavior
Select the default priority country
Select publication stage options
Check the Make These My Default Search Preferences checkbox to make your choices permanent.
Note that your Display and Sort Options may be set from the search screen, the result set, or in Preferences. See the Preferences chapter for further information.
Click the Filter Results link to display the Filter Results panel, shown below.

Use the Filter Results panel to refine your search result set.
The Filter Results panel consists of four columns. Each column represents a patent field, and contains a list of all the values found in that field in your current result set.
Select one or more inventors to display a result
set having only the selected inventors. Select
one or more assignees to display a result set having only the selected
assignees. Select
values in any or all columns. Click
the Filter Results button  to
use your filter to create a new result set.
to
use your filter to create a new result set.
Note that you may select which four fields to use as filters, and specify the sequence in which they appear, in your Patent Result Set Preferences. See the Preferences chapter for a thorough explanation.
Filtering of results is done in the following manner.
When filtering by multiple entries in the same field (e.g., Inventor A, Inventor B), the OR operator is used. This means that one or the other of the filter criteria must be present for the record to be in your filtered result set.
This works in the same manner whether you choose multiple criteria from the same scroll box or you choose the same field name from multiple dropdowns and identify multiple criteria in multiple scroll boxes.
When filtering by multiple fields (e.g., Inventor, IPC), the AND operator is used. This means that all of the filter criteria must be present for the record to be in your filtered result set.
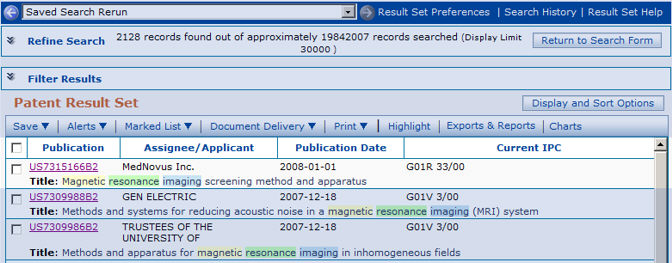
Click the Refine Search link to display the Refine Search panel, shown below.
Edit Search Query
To edit your search string, run the new search, and create a new result set, use Edit Search Query.
Search Within Result Set
To search a single field within the current result set, and create a new result set, use Search Within Result Set.
Advanced Subsearch
To perform a fielded search within the current result set, and create a new result set, use Advanced Subsearch. See the Patent Searching chapter for detailed information on fielded search.
To display the Advanced Subsearch panel, shown below, click the Advanced Subsearch link.

Return to Search Form
To return to the Search screen, click the Return
to Search Form button . The Search screen retains
all your search criteria.
Patent Citations Result Set
The results of a patent citation search are shown below. The searched patent publication number appears first. Forward citations are shown following. Backward citations are shown last.
The Collapse button toggles state when it is pressed.
To expand
any collapsed section, press its Expand button 

Family Lookup Result Set
The results of a family lookup search are shown below. The searched patent publication number appears first, and is highlighted. Family members are shown following, and are not highlighted.
The Collapse button toggles state when it is pressed.
To expand
any collapsed section, press its Expand button 

Record Updates Result Set
The results of a record update search are shown below. The record update search can return all searched publication numbers in which family, legal status, publication stage, citations or assignment has changed since the specified date.
