A work file is a saved list of links to one or more records. It does not contain the records themselves. You can save some or all of the links on your result set as a work file. You can also save a link to a single record by creating a work file from the record view. Note that the work file does not contain the record itself; only a link to the record is saved.
Thomson Innovation saves all work files in the work files folder in the Saved Work area. You cannot change this setting.
This chapter addresses the following subjects.
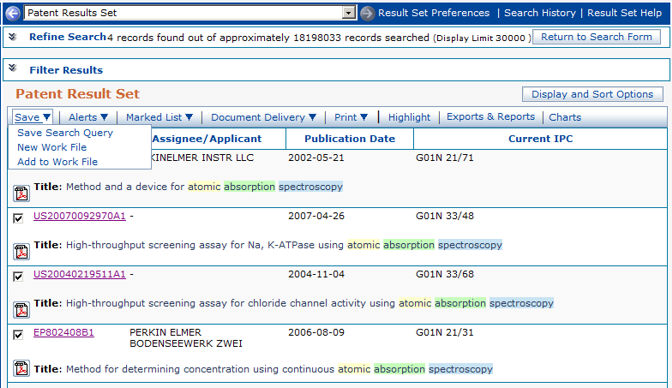
Below is a typical result set.
To create a work file from a result ret:
1. Check one
or more individual records on the page to create your work file with
OR
Use the master check box at the top of the list of records to select all
records on the page
OR
Create the work file from the entire result set by leaving all boxes unchecked
and going directly to the Save tool bar menu
2. Select either New Work File or Add to Work File from the Save menu.
New Work File
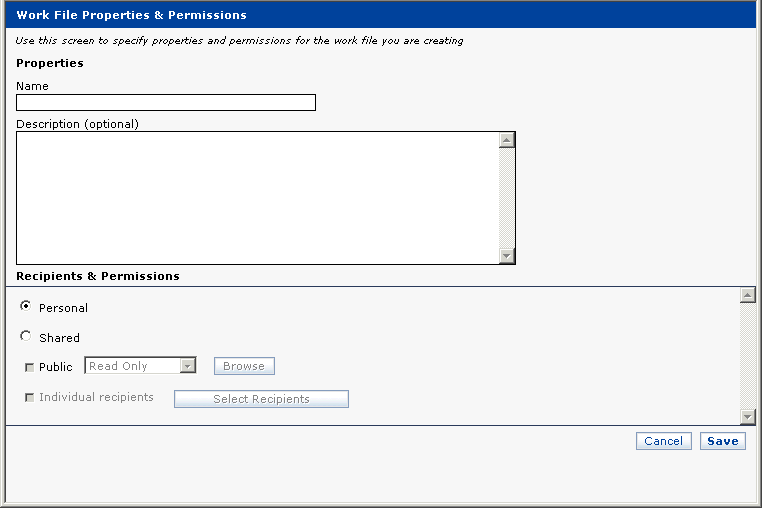
When you select New Work File, the Work File Properties & Permissions dialog displays. See below.
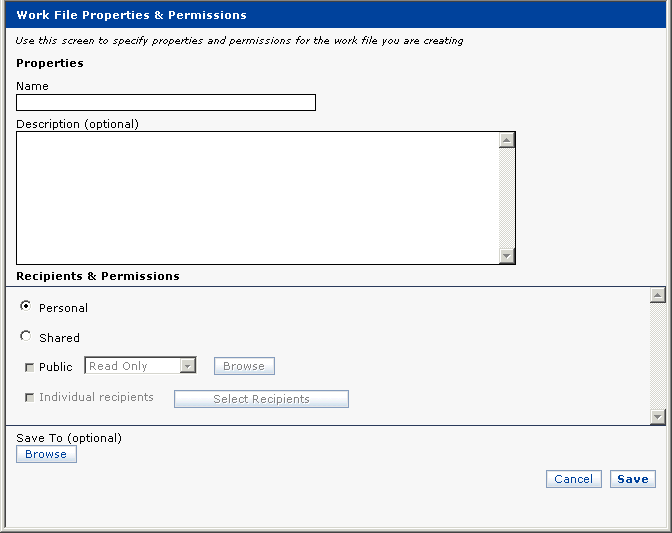
You must name the work file. Optionally, you may add a description.
Your work file is saved to the Work Files folder in your Saved Work area. If you wish, you may also save a copy in your Personal Folder, or one of its subfolders.
To save a copy to your Personal Folder, press the
Browse button  .
.
Note that a file reference is saved in your Personal Folder, rather than an actual copy. See the Saved Work chapter for further information.
The Save To Dialog
The Save To dialog is shown below.
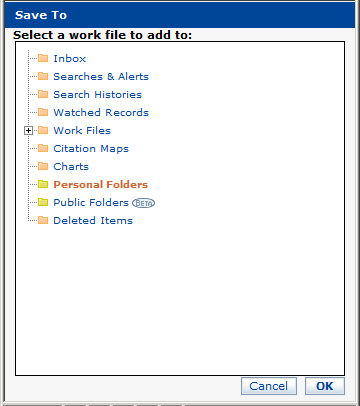
Select your Personal Folder, or one of its subfolders.
Note that you cannot select any of the Files By Type subfolders.
Then press the OK button  .
.
Press the Cancel button  to close
the Browse dialog without saving an additional copy of your work file.
to close
the Browse dialog without saving an additional copy of your work file.
Now you are returned to the New Work File dialog.
Press the Save button  to save your work file.
Press the Cancel button  to close
the New Work File dialog without saving.
to close
the New Work File dialog without saving.
Add to Work File
Add to Work File enables you to save one or more records to an existing work file.
When you select Add to Work File, the Add to Work File dialog displays. See below.
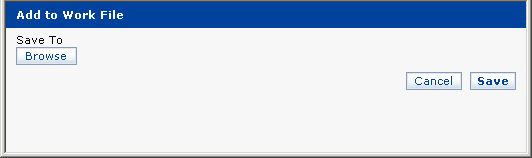
Press the Browse button  to display
the Save To dialog. See the Save To dialog, below.
to display
the Save To dialog. See the Save To dialog, below.

You may only save to an existing work file in your Work Files folder. You may not save to a work file in your Personal Folders area, since these are actually file references and, when the work file in Files by Type is updated, any corresponding work file in a personal folder is automatically updated also. anything saved to the work file . See the Saved Work chapter for a more thorough explanation.
The process for creating a work file from a record view is the same as for a result set.
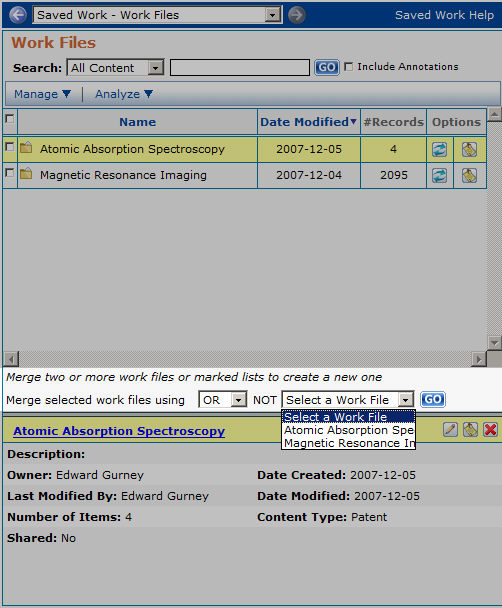
To open a work file:
1. Open the Saved Work area, shown below.

2. Select a work file
3. Click on the name of the file in the upper left corner of the file properties panel
You may edit the title or the description of work files located either in your Work Files folder, or your Personal Folder.
Note that when you edit a work file that is located in your Personal Folder, the parent work file in your work files folder changes as well. See the Saved Work chapter for a more thorough explanation.
To edit a work file:
1. Open the Saved Work area
2. Select a work file
3. Open the Edit Properties dialog, shown below
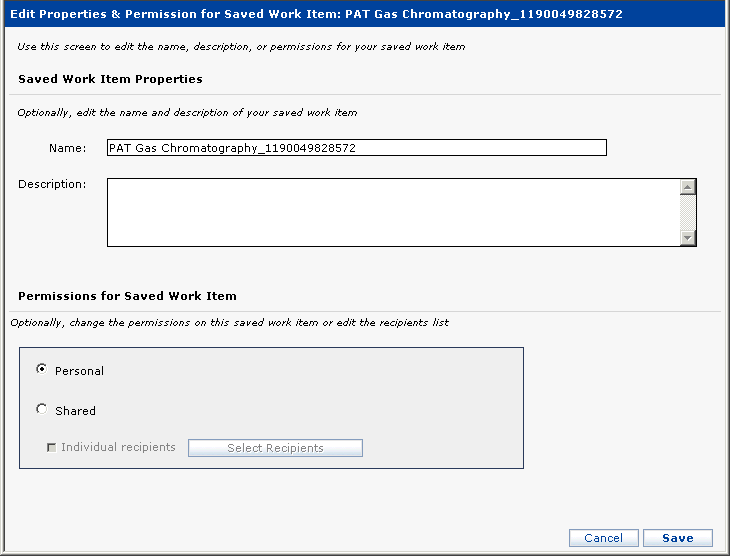
You may open the Edit Properties dialog in either of two ways.
Check the checkbox in the folder contents panel adjacent the name of the file you wish to edit, then select MANAGE, then EDIT from the folder contents panel toolbar,
or,
Click on the work file name in the folder
contents panel so that it is highlighted, then click on the Edit icon
 in the file properties panel
4. Edit the file name or description
5. Press Save
to save your changes, or Cancel to
close the dialog without saving.
To annotate a work file:
Open the Saved Work area
Select a work file
Click the Annotation
icon  either in the folder contents panel adjacent
the name of the work file you wish to annotate, or in the folder properties
panel when the work file you wish to annotate is selected. The Annotation
dialog, shown below, displays.
either in the folder contents panel adjacent
the name of the work file you wish to annotate, or in the folder properties
panel when the work file you wish to annotate is selected. The Annotation
dialog, shown below, displays.

Type your note in the Add annotation field.
You
may upload a file and attach it to your annotation. Press the Browse
button ![]() to select a file. The Choose File dialog
displays.
to select a file. The Choose File dialog
displays.
Save your annotation
by clicking the Save button  , then click the Close
button
, then click the Close
button  . Note that if you do not click the Save icon,
your annotation will not be saved.
. Note that if you do not click the Save icon,
your annotation will not be saved.
To annotate a record in a work file:
Open a work file as described in Open a Work File, above.
Select a record
Follow instructions 3 through 6 of Annotate a Work File, above.
You can copy a work file from your Work Files folder to your Personal Folder. You can also copy a work file from one folder to another within your Personal Folder. You cannot save a copy to your Work Files folder.
Remember that the “copy” is a file reference, not an actual copy. See the Saved Work chapter for additional information.
To copy a work file:
Select one or more work files by checking their check box in the folder contents panel.
Select MANAGE, then select COPY from the folder contents tool bar.
From the Browse dialog, select the destination folder.
Click the OK
button  to create the copy.
You can move files from one directory to another within your Personal Folder.
To move a file:
1. Select one or more Work Files by checking their check box in the folder contents panel.
2. Select MANAGE | MOVE from the folder contents tool bar.
3. From the Browse dialog, select the destination folder.
4. Click the
OK button to create the copy.
You can merge, or combine, two or more work files to create a new work file using the Merge feature. See below.
You can create a work file by merging other work files. One of two Boolean operators may be used.
OR
Use the OR operator when you wish the destination work file to contain records that are found either in work file 1 OR work file 2.
AND
Use the AND operator when you wish the destination work file to contain only records that are found both in work file 1 AND work file 2.
Although only two work files are used in the above example, you may perform a merge using multiple work files.
NOT
Use the NOT operator to specify a work file containing records you wish to exclude from the destination work file.
Use of the NOT operator is optional.
Select the saved searches you wish to merge by checking their checkboxes.
Select the Boolean operator you wish the merge to use. The default is OR. AND is also available.
Optionally, select a saved search from the NOT dropdown list to exclude its search terms from the merged saved search.
Press the GO
button 
Give the new saved search a name using the Work File Properties & Permissions panel, shown below. Optionally, add a description.
Press the Save
button  . The
new saved search is now shown in your Work Files folder view.
. The
new saved search is now shown in your Work Files folder view.
The resultant work file is a parent file, not a file reference, and so is saved automatically in the Work Files folder.
You can create a chart that compares the records in a work file.
Please see the Charts chapter for a complete explanation.
To delete one or more work files, select them by checking their checkboxes, then click MANAGE, then DELETE in the folder contents tool bar.
Alternatively, you may delete a single work file
by clicking the Delete icon  in the file properties
panel.
in the file properties
panel.
This chapter deals with the following topics.
Marked lists give you a convenient way to mark or tag records as you encounter them and set them aside for later review.
You can add patent, literature, and business records to a marked list.
You can add records to a marked list from a result set or a work file.
Records in a marked list can be saved to a work file, watched, used for exports & reports or charts, and managed in the same way other records are managed.
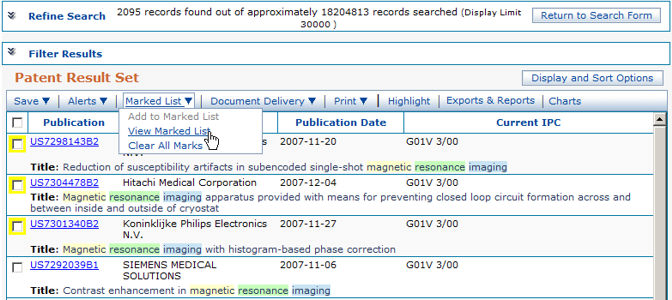
The patent result set is shown below.
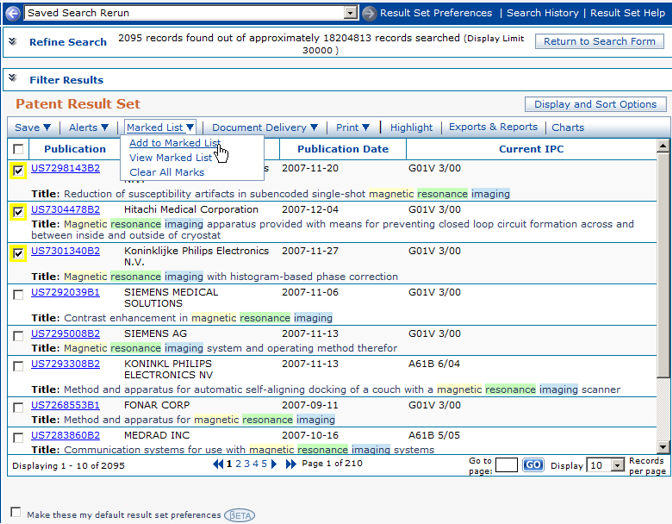
To add records to a marked list:
1. Select records by checking their checkboxes
2. Select Add to Marked List from the result set tool bar
The yellow border around the checkboxes confirms addition of the selected records to your marked list.
To view your marked list, select View Marked List from the result set tool bar, as shown below. Alternatively, select Search, then Marked List from the main menu.
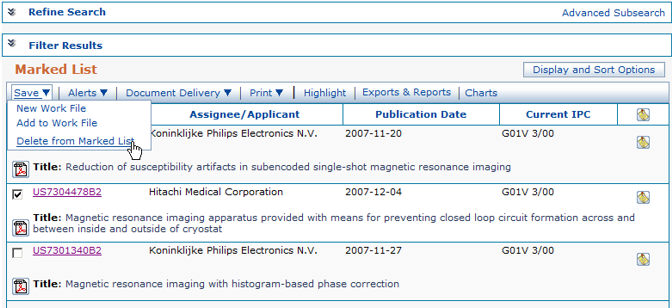
Your marked list is shown below.

To delete records from a marked list:
Open the marked list as described above in Viewing a Marked List.
Select the records you wish to remove.
Select Delete from Marked List from the Save menu on the Marked List tool bar. See below.
Your marked list is always available to you from your result set, shown above, or in your work file folder in the saved work area shown below.

Your marked list is a running list of the records you have marked. You cannot save a marked list itself, but some or all of the records on it can be saved as a work file or managed in a variety of other ways. You have only one marked list, so all of the records you mark are kept in the same list.
The tools available on a marked list tool bar are the same as those available on a normal result set tool bar. Please see the appropriate result set chapter for details on using those tools to manage your records.