Click here for Saved Searches
Click here for Watched Records
This chapter addresses the following topics.
Saved searches, alerts, and watched records are similar in some ways — and share some of the same screens — but they are three very different features.
Saved searches let you run searches without having to create them every time. You create a search and perfect it so that it does exactly what you want, then just save it. You can use it to create an alert, or just have it ready and waiting for the next time you want to run it. A saved search can be the core search you use to create variations.
You can save patent, literature, and business searches.
Alerts are notifications that a search you created has been run for you, at the time you specified, and the results of that search are available for you to review. Alerts let you run searches, and get the results, without being there. They are typically set to run at intervals that coincide with updates to the collections, so that whenever there are new records available, you are alerted about them right away.
You can create alerts for patent, literature, and business searches.
Select one or more patents that you want to watch for changes — and we will watch them for you and notify you whenever they are updated. A change in legal status could mean that the patent has expired or that the patent owner has neglected to pay the fees. A change in the assignee could mean that the patent has been sold, which could indicate a change in business focus for both the seller and buyer. Setting key records up to be watched lets you see all of this, without searching and without lengthy comparisons of records.
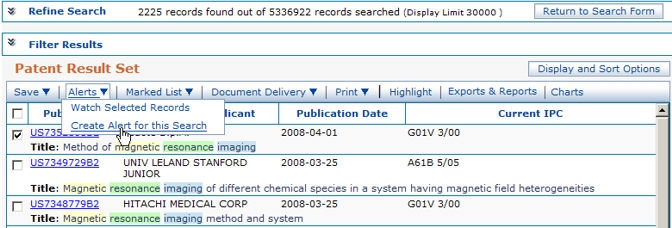
The easiest way to create an alert is directly from your search results screen as shown following.
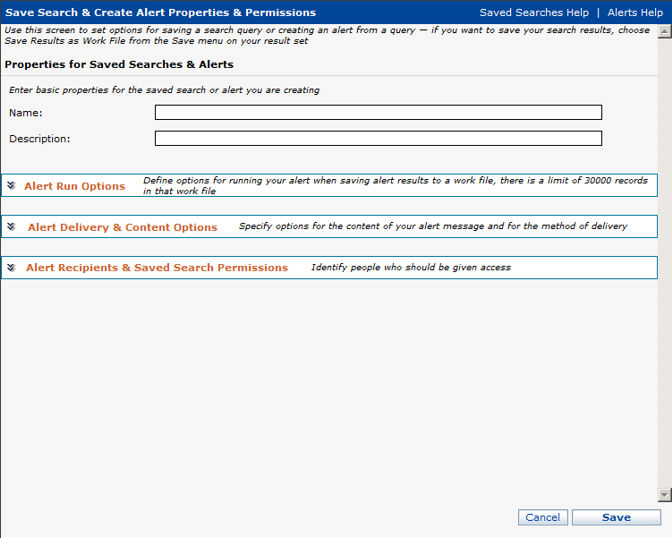
Select Alerts, then Create Alert for This Search from the main tool bar. The Save Search & Create Alert Properties & Permissions screen displays.
In the Properties section of this screen, enter a Name for your alert (required).
You can also (optionally) enter a Description.
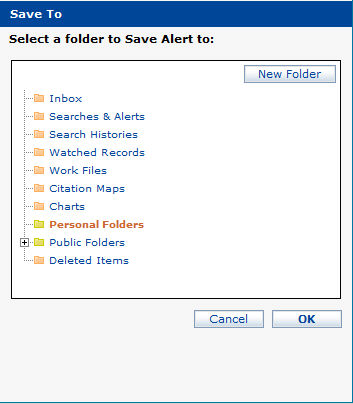
Your alert is automatically saved to the alerts folder in your Saved Work workspace. But, on this screen you can also (optionally) save an additional occurrence of this alert to one of your personal folders. To do this, either enter the path to the folder in the Save to folder field or click Browse and navigate to the desired folder.
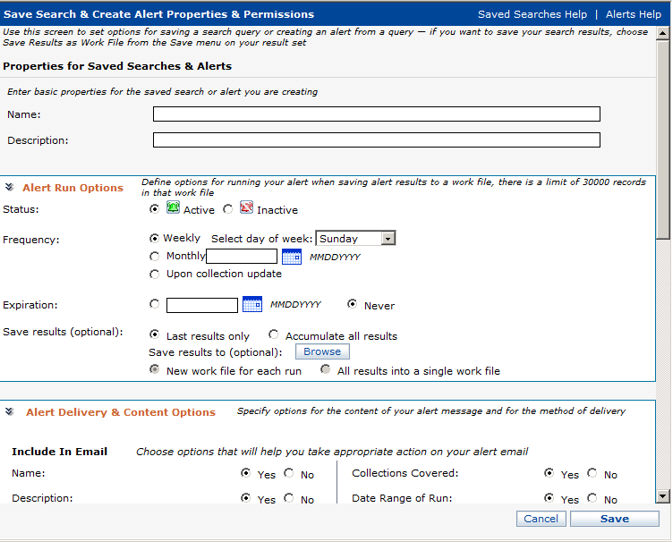
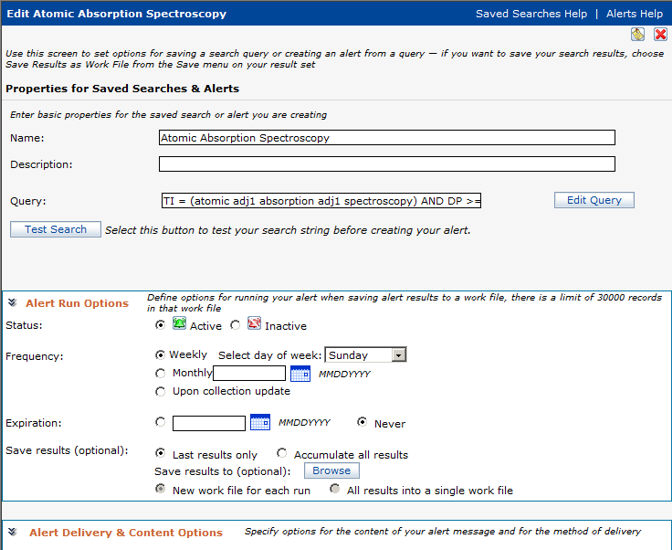
In the Alerts section of the Save Search (Set Alert) screen, complete the details about how you want your alert set up and run.
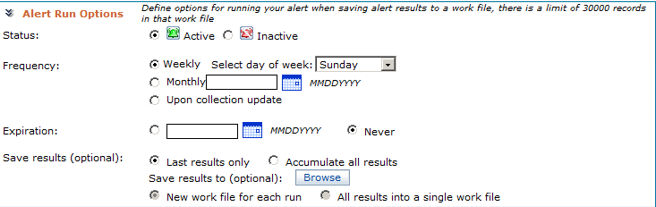
Set the Status as Active or Inactive. This means that the alert is either running (Active) or on hold (Inactive).
Under Frequency, you have three options to indicate how often you want the alert to run.
Weekly. If you choose to have the alert run weekly, you must select the day of the week you want it run. Use the drop down menu to select a day of the week.
Monthly. If you choose to have the alert run monthly, you must indicate the day of the month you want the alert run. Use the calendar tool to select a day of the month.
Upon collection update. Choose this option to have your alert run each time the collection(s) your alert is running against is updated. Choose this option to ensure you always have the most up to date information possible.
Choose to save the Last results only or to Accumulate all results. If you save only the last results, the previous results will be discarded each time new results are generated.
Results are saved to a work file in your Saved Work workspace. You can also, optionally, Browse and select a personal folder to save the work file of your results to, as shown following.
Choose to create a New work file for each run of your alert or to save All results into a single work file. Whether you create a new work file each time or update an existing one, the work files are automatically saved in your Files by Type folder in your Saved Work workspace. The optional save in the preceding step saves an additional instance of the work file to one of your personal folders.
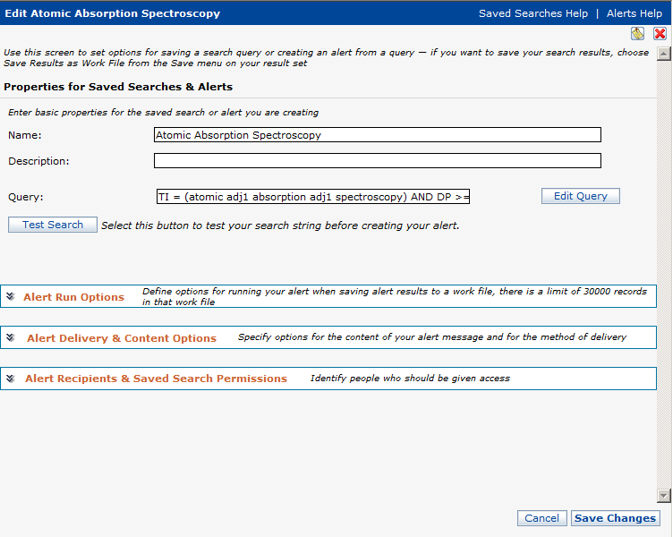
On the Alert Delivery & Content Options screen, you are presented with options for customizing your alert email notification. Choose the options that will best help you recognize, understand, and take appropriate action on your alert.
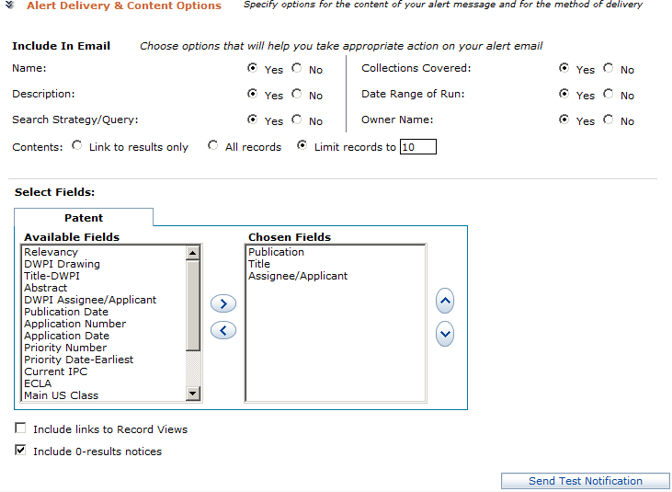
Include the Name. This is the name you gave the alert when you created it. Choose Yes or No.
Include the Description. Creating a description when you create your alert is optional — if you did not create a description, it can not be included in your email. Choose Yes or No
Include the Search Strategy/Query that was run to create your alert. Choose Yes or No.
Include a list of the Collections Covered in the search from which the alert was created. Choose Yes or No.
Include the Date Range of Run. These are dates your alert covers. Choose Yes or No.
Include the Owner Name. You may be receiving alert notifications from several people (including yourself) — including this information in your alert will help you identify the purpose of the alert. Choose Yes or No.
Use the Contents field to indicate how you want your results handled in your alert.
You can choose to Link to results only. This means that no actual records will be included in your email — just a link to see the records.
If you choose to include All Records in your email, the actual records from your results will be embedded in your email.
Choose Limit records to to include a limited number of your result records in your email — and you must specify the number you want to records limited to.
You can share your files with your associates in one or both of two ways. You can save the file to your public folder, so that it is available to all the members of your work group. You may allow or prohibit annotations to your file by others.
You may also share files via email by adding them to your Individual Recipients list.
You and the members of your work group can use Public Folders to share any type of Thomson Innovation file with one another. You can create folders and subfolders in Public Folders.
When you open Public Folders, you will see all the folders created by other members of your work group, as well as those you have created yourself. You are the owner of folders and folder contents that you have created yourself, and you may rename or delete these folders. You may not rename or delete folders created by others. You may not copy or move a public folder, even if you are the owner. Your Public Folder contains file references, rather than actual files. For this reason, you may place files of any type into a single folder.
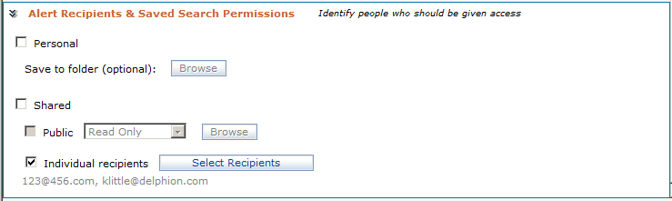
In the Alert Recipients & Saved Search Permissions section, you can specify overall permissions for your alert and identify who should receive it by email.
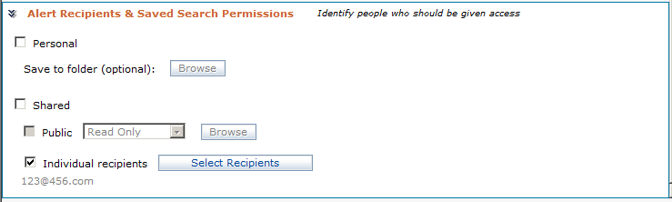
Check the Individual Recipients check box to identify users and other individuals (in addition to yourself) to receive the alert you are creating.
Click the Select Recipients button to use the directory to choose users and add other individuals who should receive your alert.
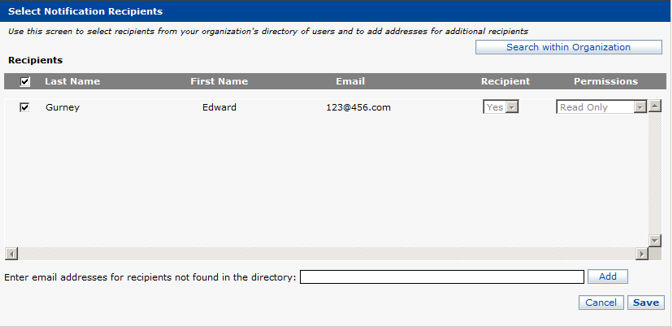
Use the Select Notification Recipients screen to access your organization’s directory to select individual users and groups of users from within your organization to receive the alert you are creating. Also use this screen to enter the email addresses of individuals outside of your organization to your list of alert recipients.
To search for users with your organization
Click the Search within Organization button to search your company directory.
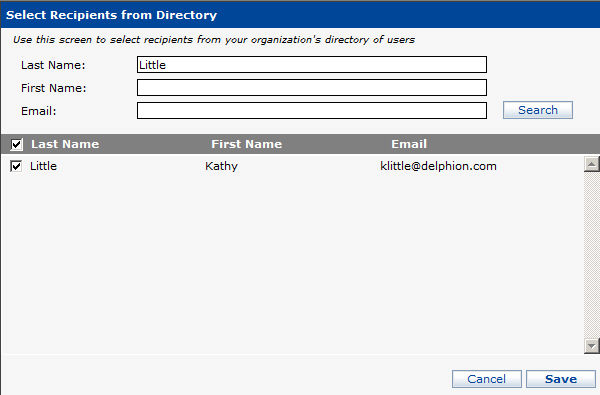
The Select Recipients from Directory screen displays.
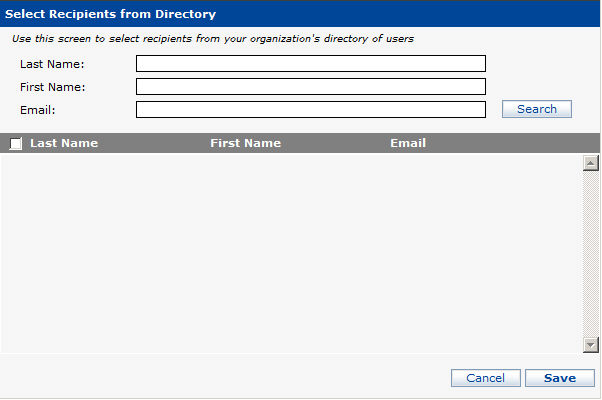
On the Select Recipients from Directory screen, you can search for users by Last Name or by First Name. Enter your search criteria in the fields provided and click Search.
The Select Recipients from Directory screen refreshes, showing the users in the directory who match the search criteria you specified, as shown following.
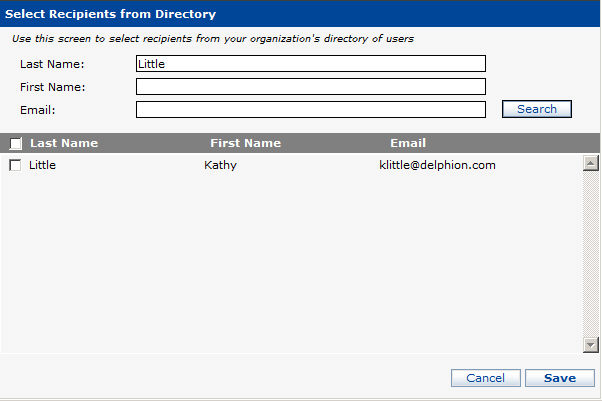
Use the check box in the gray bar to select all users shown — or use the individual check boxes to select users one-by-one.
Click Cancel to continue without selecting any users or click Save to add selected users.
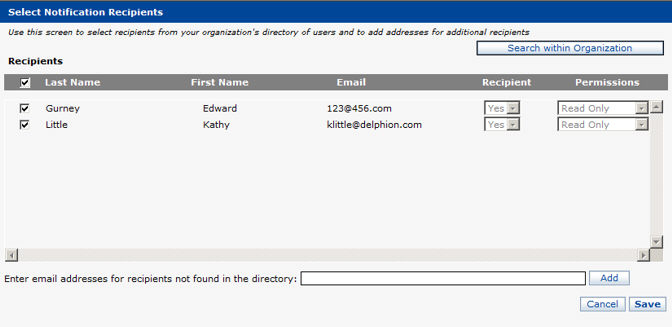
The Select Notification Recipients screen re-displays with your selections, as shown following.
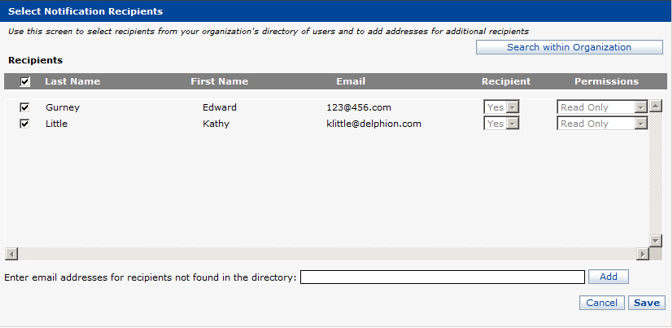
To add other individuals to your notification list:
Enter email addresses of others who you want to receive your alert in the text box provided. Enter only one address at a time.
Click Add and the screen re-displays with your addition, as shown following.
Review all users shown. Use the check box in the gray bar to select all users shown — or use the individual check boxes to select users one by one.
Click Cancel to continue without selecting any users or click Save to add selected users to your notification list.
The Alert Recipients & Saved Search Permissions screen re-displays showing your selections, as shown following.
After all your choice are made and options specified, you will be back on the Save Search (Set Alert) screen.
Click Save to save all input and create an alert with the specified options.
Click Cancel to discard all input and return to your result set without creating an alert.
Following is a sample alert received by email:

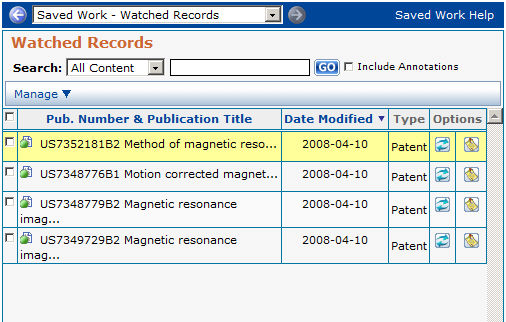
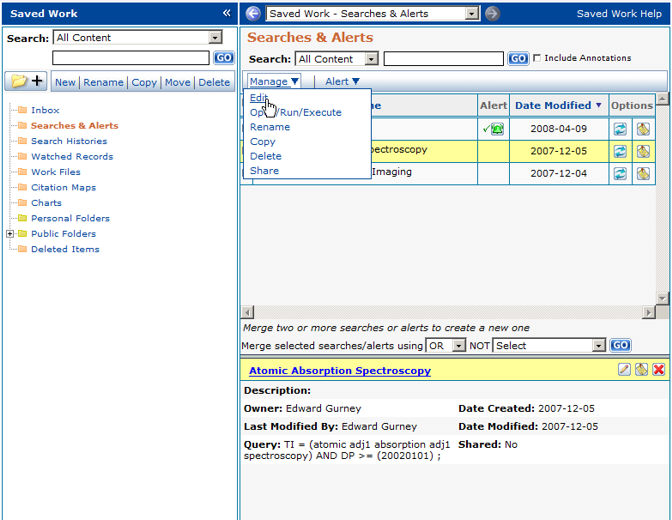
To edit an alert, display the alert in your Saved Work workspace as shown following:
Select the alert you want to edit by checking the corresponding box on the left of the alert name.
From the drop down Manage menu, choose Edit.
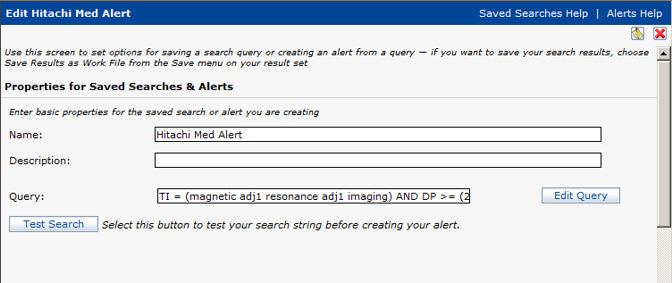
The Edit Alert screen displays (shown following) and you edit the alert in the same manner with the same screens you used to create it.
This chapter addresses the following topics.
Saved searches, alerts, and watched records are similar in some ways — and share some of the same screens — but they are three very different features.
Saved searches let you run searches without having to create them every time. You create a search and perfect it so that it does exactly what you want — then just save it. You can use it to create an alert — or just have it ready and waiting for the next time you want to run it. A saved search can be the core search you use to create variations.
You can save patent, literature, and business searches.
Alerts are notifications that a search you created has been run for you — at the time you specified — and the results of that search are available for you to review. Alerts let you run searches, and get the results, without being there. They are typically set to run at intervals that coincide with updates to the collections — so that, whenever there are new records available, you are alerted about them right away.
You can create alerts for patent, literature, and business searches.
Select one or more patents that you want to watch for changes — and we will watch them for you and notify you whenever they are updated. A change in legal status could mean that the patent has expired or that the patent owner has neglected to pay the fees. A change in the assignee could mean that the patent has been sold, which could indicate a change in business focus for both the seller and buyer. Setting key records up to be watched lets you see all of this, without searching and without lengthy comparisons of records.
You can create a saved search from your search screen or from your result set. If you create your saved search from your search screen, you can test the syntax of your query, but you won't have actually run the search yet to make sure you get the results you expect.
If you create your saved search from your result set (as shown following), you will still have been able to test your syntax, but you will also have run the search and be able to see if you got the results you were expecting.
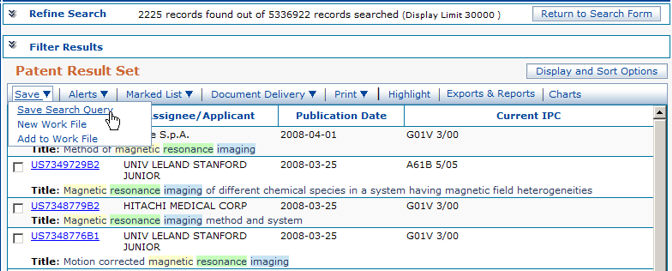
Select Save, then Save Search Query from the main tool bar. The Save Search & Create Alert Properties & Permissions screen displays.
In the Properties section of this screen, enter a Name for your saved search (required).
You can also (optionally) enter a Description.
Press the Save button. Your saved search is automatically saved to the Searches & Alerts folder in your Saved Work workspace.
The Save Search & Create Alert Properties & Permissions screen is shown below.
The final step in the process is to click the Save button at the bottom of the Save Search & Create Alert Properties & Permissions screen.
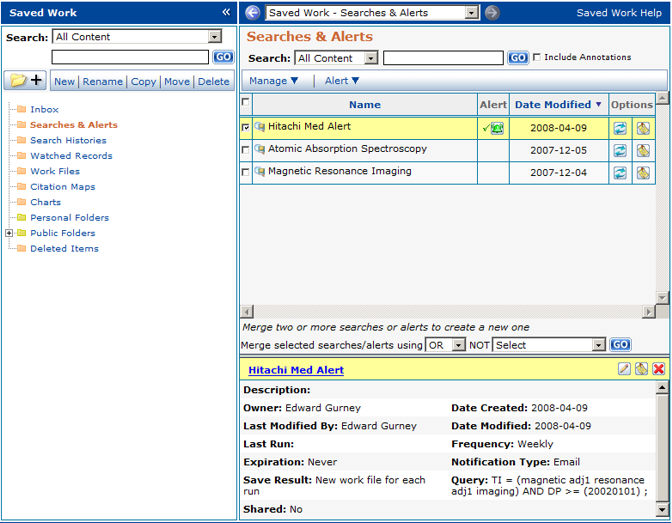
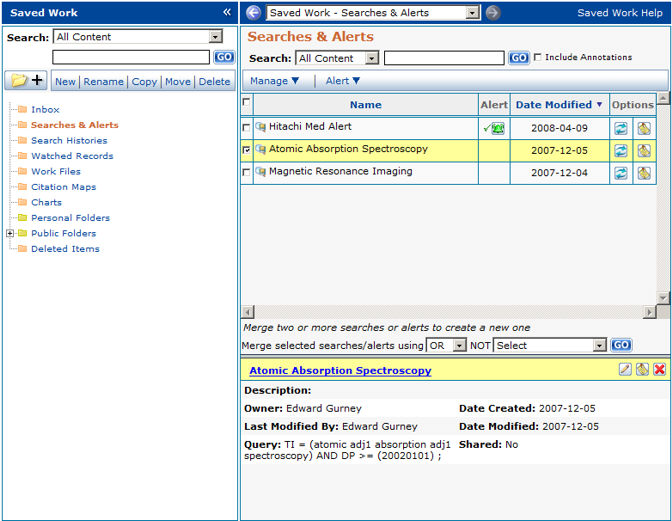
When you create a saved search, it is automatically saved to the Searches & Alerts folder in your Saved Work workspace, as shown following.
In this case, we are looking at a saved business search: Apple NOT records. You can see what the query was and when it was last modified. You can tell that it is not an alert because the Alert column is empty (unlike the item on the line following our Apple NOT records entry).
Running a saved search is simple, just click the
run icon  in the options column in your workspace.
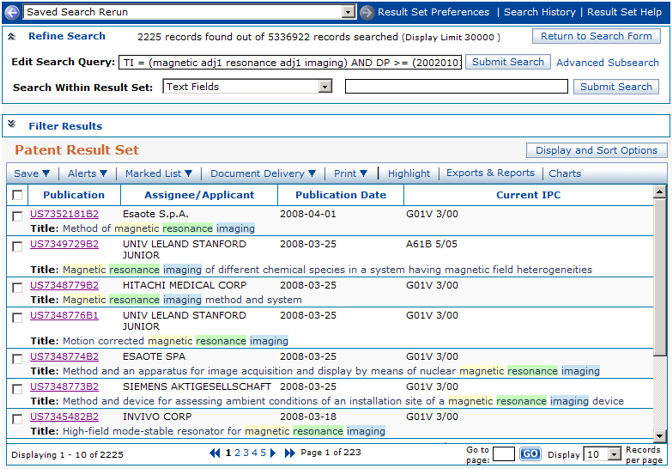
Your search result set then displays, as shown following. You can
review the results from your search. You can use the Refine
Search tools to edit the query and run a new search —
and save that new search if desired.
in the options column in your workspace.
Your search result set then displays, as shown following. You can
review the results from your search. You can use the Refine
Search tools to edit the query and run a new search —
and save that new search if desired.
You may have also saved an occurrence of this saved search to one of your personal folders. The process for running a saved search is the same whether you are working in your Searches and Alerts folder or working in a personal folder.
You can share the results of your alert with others just as you would share any other alert.
You can share your files with your associates in one or both of two ways. You can save the file to your public folder, so that it is available to all the members of your work group. You may allow or prohibit annotations to your file by others.
You may also share files via email by adding them to your Individual Recipients list.
You and the members of your work group can use Public Folders to share any type of Thomson Innovation file with one another. You can create folders and subfolders in Public Folders.
When you open Public Folders, you will see all the folders created by other members of your work group, as well as those you have created yourself. You are the owner of folders and folder contents that you have created yourself, and you may rename or delete these folders. You may not rename or delete folders created by others. You may not copy or move a public folder, even if you are the owner. Your Public Folder contains file references, rather than actual files. For this reason, you may place files of any type into a single folder.
One way to create an alert from a saved search is to begin by selecting that saved search on your Saved Work workspace as shown following.
Select the saved search you want to create an alert for by checking the corresponding box on the left of the saved search name.
From the drop down Alerts menu, choose Set.
The Save Search (Set Alert) screen displays (shown following).
Use this screen to begin creating your alert. See Alerts for more information.
To edit a saved search, select that search on your work space display (shown following), click the Manage drop down menu, and choose Edit.
Select the saved search you want to edit by checking the corresponding box on the left of the saved search name.
From the drop down Manage menu, choose Edit.
Save Search & Create Alert Properties & Permissions screen displays (shown following) and you edit the saved search in the same manner with the same screens you used to create it.
This chapter addresses the following topics.
Saved searches, alerts, and watched records are similar in some ways — and share some of the same screens — but they are three very different features.
Saved searches let you run searches without having to create them every time. You create a search and perfect it so that it does exactly what you want — then just save it. You can use it to create an alert — or just have it ready and waiting for the next time you want to run it. A saved search can be the core search you use to create variations.
You can save patent, literature, and business searches.
Alerts are notifications that a search you created has been run for you — at the time you specified — and the results of that search are available for you to review. Alerts let you run searches, and get the results, without being there. They are typically set to run at intervals that coincide with updates to the collections — so that, whenever there are new records available, you are alerted about them right away.
You can create alerts for patent, literature, and business searches.
Select one or more patents that you want to watch for changes — and we will watch them for you and notify you whenever they are updated. A change in legal status could mean that the patent has expired or that the patent owner has neglected to pay the fees. A change in the assignee could mean that the patent has been sold, which could indicate a change in business focus for both the seller and buyer. Setting key records up to be watched lets you see all of this, without searching and without lengthy comparisons of records.
Begin on the record view of the patent you want to watch, like the patent record shown following.
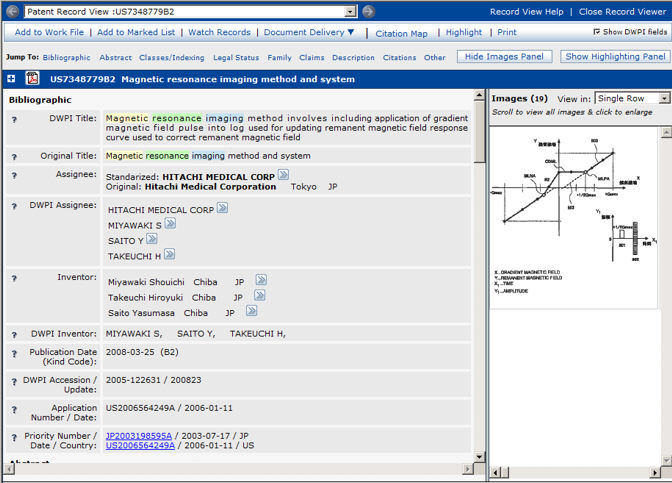
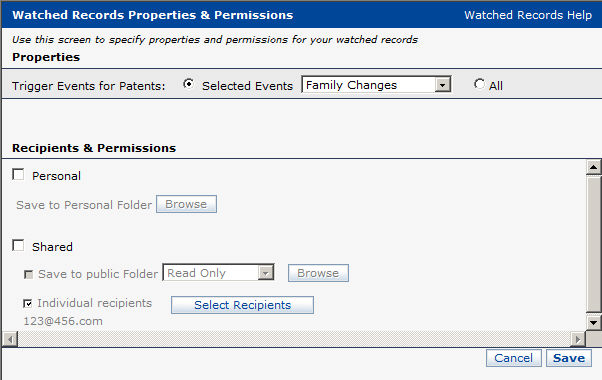
Select Watch Records from the main tool bar. The Watched Records Properties & Permissions screen displays.
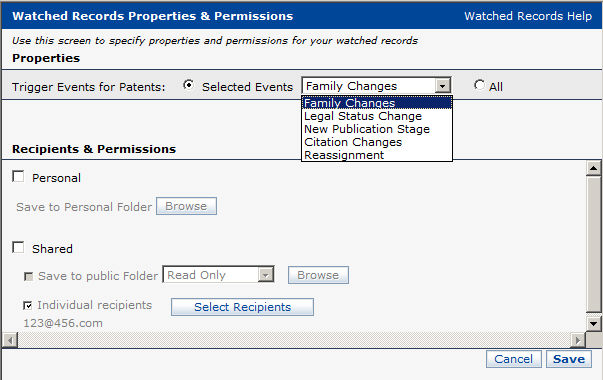
In the Properties section of this screen, indicate
whether you want to watch Selected Events or All events that occur.
If you choose to watch Selected Events, You can choose to watch:
Family Changes. Choosing this option means that you will be notified whenever new members are added to the family this record belongs to.
Legal Status Changes. Choosing this option means that you will be notified whenever there is a change to the legal status of this record. For example, when an assignment is made or a disclaimer is filed.
New Publication Stage. Choosing this option means that you will be notified whenever there is a change to the publication stage of this record.
Citation Changes. Choosing this option means that you will be notified whenever new citations are made of this record.
If you choose to watch All events that occur,
you will be notified whenever anything changes on that record.
In the Watched Records Recipients & Permissions screen, you can specify overall permissions for your watched record and identify who should receive it by email.
You can share your files with your associates in one or both of two ways. You can save the file to your public folder, so that it is available to all the members of your work group. You may allow or prohibit annotations to your file by others.
You may also share files via email by adding them to your Individual Recipients list.
You and the members of your work group can use Public Folders to share any type of Thomson Innovation file with one another. You can create folders and subfolders in Public Folders.
When you open Public Folders, you will see all the folders created by other members of your work group, as well as those you have created yourself. You are the owner of folders and folder contents that you have created yourself, and you may rename or delete these folders. You may not rename or delete folders created by others. You may not copy or move a public folder, even if you are the owner. Your Public Folder contains file references, rather than actual files. For this reason, you may place files of any type into a single folder.

Check the Individual Recipients check box to identify users and other individuals (in addition to yourself) to receive the watched record notification you are creating. The Select Notification Recipients screen displays.
Use the Select Notification Recipients screen to access your organization’s directory to select individual users and groups of users from within your organization to receive the alert you are creating. Also use this screen to enter the email addresses of individuals outside of your organization to your list of alert recipients.
To search for users with your organization:
1. Click the Search within Organization button to search your company directory.
2. The Select Recipients from Directory screen displays.
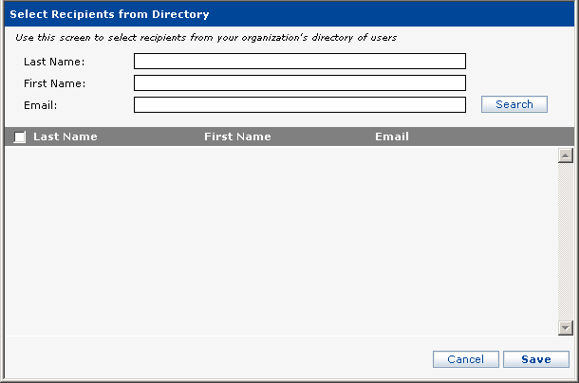
3. On the Select Recipients from Directory screen, you can search for users by Last Name or by First Name. Enter your search criteria in the fields provided and click Search.
4. The Select Recipients from Directory screen refreshes, showing the users in the directory who match the search criteria you specified, as shown following.
5. Use the check box in the gray bar to select all users shown — or use the individual check boxes to select users one-by-one.
6. Click Cancel to continue without selecting any users or click Save to add selected users.
7. The Select Notification Recipients screen re-displays with your selections, as shown following.

To add other individuals to your notification list:
1. Enter email addresses of others who you want to receive your alert in the text box provided. Enter only one address at a time.
2. Click Add and the screen re-displays with your addition, as shown following.
3.
Review all users shown. Use the check box in the gray bar
to select all users shown, or use the individual check boxes to select
users one-by-one.
NOTE: The Recipient and Permissions features are not available
at this time.
4. Click Cancel to continue without selecting any users or click Save to add selected users to your notification list.
5. The Watched Records screen re-displays showing your selections, as shown following.
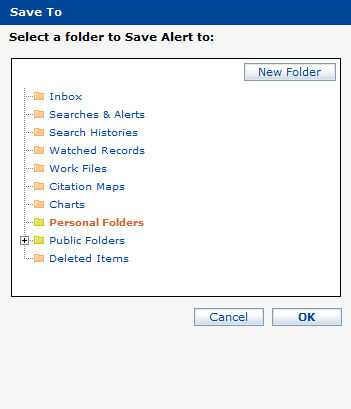
Watched records are automatically saved to your Saved Work workspace.
You can also, optionally, save your watched record to one of your personal folders. Click on the destination folder to select it, then press the Save button.
When the record you are watching changes, you (and any users, groups, or individuals) will be notified by email. The email will tell you what record has changed and give you a link to that record.
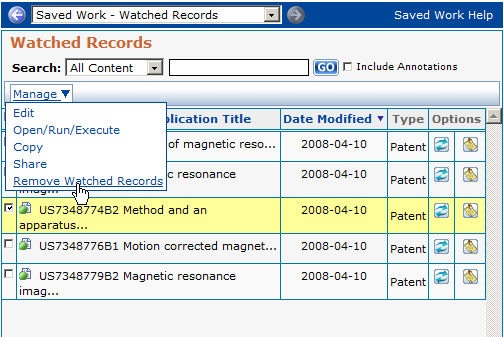
To stop watching a record, first display your list of watched record in your files and folders workspace, as shown following.

Select the record you want to stop watching by checking the box next to the Record Title
Click Manage to display the drop down menu, and select Remove Watched Records, as shown following.
Your watched record list re-displays and the selected record has been removed, as shown following.